
FOR THIS PROJECT YOU WILL NEED
- A micro:bit
- Pimoroni pin:bit
- A momentary switch / pushbutton
- A breadboard
- 2 x Screw Terminals (1x 4 terminal 1x 2 terminal)
- 1 x Wago 5 pole 221 connector
- 3 LEDs (we went to the dollar store and picked up a string of garden LED lights, powered by 2x AA batteries)
- Length of wire
- Either soldering or crimping tools
- Cardboard box
- Craft materials to decorate the box
INTRO
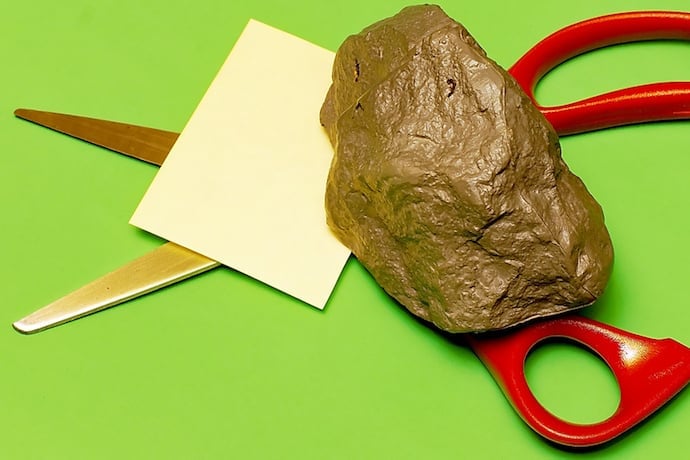
Rock, paper, scissors is a classic game that we have all played as children, or as adults when deciding who’s turn it is to go for the office coffee. At the heart of the game we have an algorithm, in fact it is a conditional test, where the choice of one player is compared to another.
Rock, blunts scissors, but is wrapped by paper.
Paper, wraps rock, but is cut by scissors.
Scissors, cuts paper, but is blunted by rock.
So in this project we shall be creating our own opponent to play the game, an opponent in the form of a micro:bit, and to house the project we shall raid the recycling box and find a nice cardboard box.
In this project we will learn about:
- Loops
- Conditional Tests
- Inputs
- How to use Variables
- How to use random numbers
So let’s get started!
HARDWARE
The micro:bit uses alligator / crocodile clips for quick circuits involving only 5 GPIO pins (0, 1, 2 ,3V, GND) , but in this project we need more GPIO pins and we need them for our breadboard! So for this we shall use the Pimoroni pin:bit, an adapter that enables the extra GPIO pins of our micro:bit to be broken out for use with a breadboard.

The micro:bit simply connects to the pin:bit by way of a slot, in to which we slide the micro:bit. Now insert the pin:bit into a breadboard.

Also insert into the breadboard the 4 terminal screw terminal, this should be inline with the pin:bit GPIO connections for pins 0, 2, 8 and 13. Next insert the 2 terminal screw terminal so that it is inline with pin:bit connections for 3V and GND.

Now let’s take our Wago connector. These connectors create a “common”, so to illustrate how it works, let’s connect a wire from the GND screw terminal on our breadboard and place it into the first slot of the Wago, just lift the lever for the slot and it will open up. Insert the wire and then snap the lever down to lock the wire in place, just watch your fingers as they do bite! So now that we have a GND connection from the micro:bit to the Wago, we now have four extra GND connections…a common ground!

Our three LEDs are taken from a garden light set powered by two AA batteries, this means they work with 3V of power, ideal for the micro:bit! Typically these LEDs are wired in series, a long chain of LEDs linked together. This means we can snip the battery box off, leave yourself about 3 inches of spare wire on the box as it can be used in another project. Now we have the LEDs we can snip them from the chain. Follow the wire that was from the battery box to the first LED in the chain. When you get to the LED, there should be two more wires coming out of it and to the next LED in the chain. Snip the wires going FROM the first LED, to the second! Repeat this for the second LED to the third, and the third LED to the fourth.

You should have three LED bulbs each with two wires coming from them…but how do we know which is positive (Anode) and which is negative (Cathode)? Well to find this out we need to strip the wires from each LED bulb and then get a coin cell battery (CR2032 is ideal) and then press the one wire to one side of the battery, and the other to the remaining side. If the LED lights up then make a note using a Sharpie as to which is – (GND). The CR2032 battery has a positive side marked with a + (typically it is the large flat side) so it is easy to identify the polarity) Do this for each LED bulb. Now that we know the polarity of the LEDs we can now insert the GND wires for each into the spare Wago slots. The remaining wires for each LED bulb can be inserted into the screw terminals for GPIO 0,2,8.

The last hardware connection is for our button, used to trigger the game. For this we went into the bits box and found a rectangular arcade button. This button has two possible connections, NO = Normally Open, when a switch needs to be closed to connect two points together, and NC = Normally Closed, the switch is closed but when we press the switch it opens, breaking the connection. We want to connect two wires to the button, one to NO and the other to C (Common). If you have the equipment, then you can crimp the wires on, if not then solder the wires. Now connect the wire from NO to the 3V screw terminal. Connect the wire from C (Common) to GPIO 13 screw terminal.
If you are using a two pin button (either an arcade button or another type of button), then connect the wires from the button to the same screw terminals on the breadboard.
To contain the project, we need to put it in a box. But we don’t need no 3D printers or laser cutters! We have cardboard. Choose a suitable box, decorate it, make some holes and insert the LED bulbs, also make a hole at the back for the micro USB cable to go through. We also used a label maker to label each of the LED bulbs.
The last thing to do is plug in the micro USB cable to our micro:bit and then connect it to our computer! We can start writing code!

SOFTWARE
To program the project we shall use the JavaScript blocks editor and for this we need to be online and in a browser open https://makecode.microbit.org/.
We’ve covered how to write code in previous issues, but to put it simply, we move blocks of code from the menu into the coding area on the right hand side. With that in mind we shall start.
All of the code that we shall be creating will be inside a forever loop, which has been placed by default by the software for us.

Inside the loop we shall put our first conditional test, this is an “if..else” test and it can be found in the Logic menu.
The first test is to see if our button, connected to pin 13, has been pressed. If that is correct, then the button press will link pin 13 to 3V, causing the pin to go “HIGH / 1”, in other words turn on. This change in state is used to trigger the game.

To work with the pins we need to click on Advanced and then open the Pins menu. The top entry is “digital read pin P0” drag this into the coding area, but don’t attach it just yet. Using the dropdown arrow for this block, change P0 to P13.

So now we need to construct a test, so that “if digital read pin P13 == 1”, which means “if the button is pressed” and for this we need to go to Logic and drag the “0 = 0” block so that it connects to our “if..else” block. Then we place the “digital read” block in the left 0, and in the right 0 we change it to 1, which means that the button has been pressed.

But what happens when we press the button? Well “then” the code is run to randomly select an LED, and for this we need to create a new Variable. Go to Variables and click on Make a Variable and call it “Choice”. Now drag Set item to 0 and place it inside the “then” section. Change “item” to “Choice”.

Inside of the “choice” variable, we shall store a random number between 0 and 3, which represents our LEDs. To do this we need to go to Math and connect the pick random 0 to 4 block to our variable. Change the 4 to 3 to match the number of LEDs.
For the next part of this code, we need create another “if… else” conditional tested (this is called a nested conditional test) so go back to Logic and drag the “if… then… else” block so that it is inside the then of the previous test.

But we’re not finished yet! We need to edit this block so that it has “if… elseif… elseif.” But why? Well if the first test “if” is False, then the code will check the second test “elseif”, if that is also False then it checks the next “elseif”, and that has to be True as we are only working with three numbers. Click on the “gear icon” and arrange the blocks so that they show “if, else if, else if”, to close and set the blocks, click on the “gear” icon again.

The first test in this new conditional statement is to check the number randomly chosen and stored in our “Choice” variable. If this is 0 or 1 then the test is True and we shall run some code. Why 0 or 1? Well the random block counts from 0 so we need to make sure that we capture that number as well. From Logic drag “_ or _” and connect it to if. Now also from Logic drag two “0 = 0” and put one in each of the blanks of “_ or _ “. Next go to Variables and drag “Choice” and place it in the first 0 of each “0 = 0” block. Then change the value of the last 0 in the last “0 = 0” block to 1.

So if the choice is 0 or 1, what happens? Well the LED bulb connected to pin 0 (Rock) is turned on for 2 seconds, then turned off. To do this we need to to go Pins and drag digital write pin P0 to 0 and place it inside the “then” part of the test, also we change the value to 1 which means “turn on”. Next we go to Basic and drag the pause(ms) 200 block and place that under the previous block. Change the 200 to 2000 as there are 2000 milliseconds (ms) in 2 seconds.

The next test is to see if the number 2 has been chosen, if it has then we turn on a different LED bulb. For his we need to go to Logic and drag the “0 = 0” block and connect it to “else if” then in the first “0” we place a “Choice” block from Variables and in the second “0” we change it to “2”. Our LED bulb for this test is connected to GPIO 2 and it refers to “scissors”, it lights up in the same manner as the previous LED bulb.

For the final bulb, connected to GPIO 8 we replicate the previous code, and chance the value of the test to 3, and the digital pin to P8.

We now come out of this nested conditional test and move to the “else” part of the original test to see if the button has been pressed. If it has not been pressed, then the “else” portion of the code is activated, and what does it do? Well it simply cycles through all of the LEDs connected to pins 0,2 and 8. Using the digital write block from pins it turns on a pin for 50 milliseconds, then turns off, waits another 50ms then turns the next pin on and off for the same duration. A simple yet pleasant “attract” light sequence that we can see in fairs across the world.
So there we have all of the code for this project.
Check your code against ours to make sure that you have everything in place.

When ready, go to the bottom of the screen and change “Untitled” to “Rock-Paper-Scissors” and then click Download.
Copy the downloaded HEX file, from your Downloads folder, on to the micro:bit drive that appeared when you connected the micro:bit to your computer earlier. Your micro:bit will have a yellow flashing light on the rear, this means the code is flashing to the micro:bit. Once it stops, then the LEDs should start flickering in the “attract” pattern.
So choose “rock, paper, scissors” and say it out loud… then press the button and see if you can beat the computer!
So what have we learnt?
We’ve learnt that computers make decisions based on logic.
We’ve learnt that we can control a game using a button.
We’ve learnt how to generate random numbers.
We’ve learnt how to store data into variables.
We’ve learnt how to use loops to run the game forever.
We’ve learnt how to control the pins of a micro:bit.
We’ve learnt that dollar stores have components that we can use.
We’ve learnt that cardboard is the best way to prototype ideas.
Learn More
Ben Heck Show: Back to Basics Electronics Tutorials
Key skills like how not to fry your projects.
http://www.youtube.com/playlist?list=PLwO8CTSLTkijrSW6DIFsQxcvjRo5fZ-y5