
What will you need for this project?
- A microbit
- Micro USB lead to connect micro:bit to computer
- An LED
- 6 x Crocodile Clips
- A 3.5mm Powered Speaker
- Metal Tweezers
- An Operation board game
All of the code for this project and a high resolution circuit diagram can be found at https://github.com/lesp/Beanz-microbit-operation/archive/master.zip


Intro
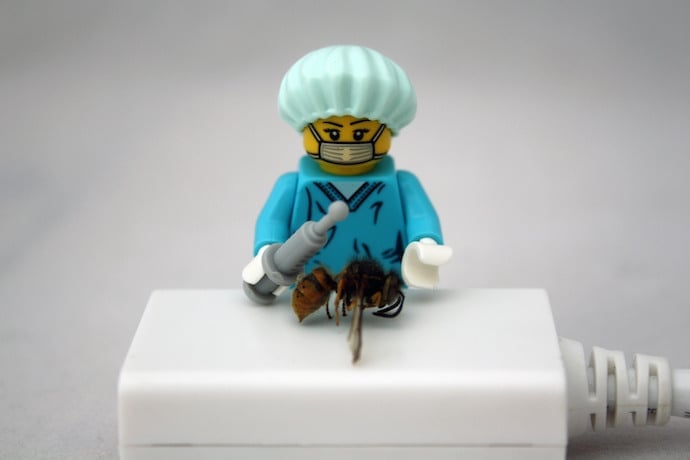
In this project we shall reuse an old Operation board game, a game that was first sold in 1965! Typically you can find this game in thrift stores, yard sales and attics and it shouldn’t cost you more than a few dollars.
The game focuses on removing items from a poor patient using metal tweezers. These tweezers are connected to a battery and carry 3V of electricity (2xAA batteries) when these tweezers are used to remove an item the “surgeon” has to be careful as around the “wounds” there is a metal frame which is also connected to circuit as our tweezers. If the surgeon touches the metal with the tweezers the the circuit is completed and the buzzer goes off, and the nose lights up. This is fun, but we can make it better using micro:bit.
So using a micro:bit we shall replace the buzzer with synthesised speech, and give the patient a nose job with a new LED. We shall be using crocodile clips to make our circuit, and we shall code the project using micro Python, a form of Python 3 for microcontrollers such as the micro:bit.
What’s great about this project is that it is non-destructive meaning that our game can return to normal.
We shall be covering the following concepts:
- Importing libraries of pre-written code.
- Using loops to repeat code indefinitely, and for a predetermined number of times.
- Synthesising speech.
- Using conditional logic.
- Converting integers to strings.
So let’s start hacking!
Getting Started

Our first task is to connect the LED to the micro:bit. For this we will need two of the crocodile clips and of course the LED. We need to connect the short leg of the LED to the GND pin of the micro:bit, and the long leg of the LED to Pin 1, using the crocodile clips. Now we do not want the crocodile clips for Pin 1 and GND to touch each other so some tape around the Pin 1 crocodile clip will keep everything separate. Then use modelling clay to secure the LED to the “nose” of the patient.

In order to hear the synthesised voice generated from the micro:bit, we need to connect our powered speaker using crocodile clips. The tip of the 3.5mm headphone connection goes to Pin 0 on the micro:bit, and the base of the connection goes to GND on the micro:bit.

Our Operation game board is connected to Pin 2 of the micro:bit and we shall use this pin as an input later in our code.

Our last hardware connection is to connect our tweezers to the 3V pin on the micro:bit.
Now tidy the wires to ensure that our game looks neat and tidy…ready to play! But first we need to write the code.
Writing the code
To code the micro:bit we used micro Python using the Mu editor. You can download a copy of Mu for your operating system by following the instructions on their website https://codewith.mu/
In Mu we start the code by importing two libraries of pre-written Python code. These are the micro:bit library, used to interface with the board, and the speech library, used to generate the synthesised speech.
Add this code before moving on.
from microbit import *
import speech
Our next step is to create a variable called “lives” which will contain the number of lives our surgeon will have. In this case we set the value to 3, an integer, a number with no decimal point.
Add this code before moving on.
lives = 3
In order for our game to run continuously we need to use a loop that will run forever, and in Python this is called “while True”.
Add this code before moving on.
while True:
You will now notice that the code inside the loop is indented. This is how Python identifies that the code belongs inside the loop. Typically indentation is either four spaces or one TAB key press, but never mix them up as it will cause errors that will need to be debugged.
Inside the loop we have two lines, one which will scroll the number of lives that our surgeon has across the LED matrix on the front of our micro:bit. The second line will use speech synthesis to speak the information. The “speech.say” function can speak any string of text, but in order to join (concatenate) the number of lives stored in the “lives” variable into a sentence we need to convert them from an integer to a string (str).
Add this code before moving on.
    display.scroll('You have ' + str(lives) + ' lives')
    speech.say('You have ' + str(lives) + ' lives to operate on the patient. Good luck')
In order for our surgeon to have three attempts at removing the troublesome objects in the patient we need to create a loop that will only loop while the surgeon has more than zero lives. As we know from any video game, if you have zero lives, well it’s game over! So this loop will continue as long as the variable “lives” contains an integer greater than 0.
Add this code before moving on.
while lives > 0:
As we have created another loop, our Python code is indented once again to show that it belongs inside this new loop. We have created a loop within a loop: a nested loop.
The first line inside this new loop is to write a conditional test. This will check the value of Pin 2, remember that is the pin connected to the patient on the operating table. The default value of this pin is 0, in other words no power / current is flowing through it (Off). If we touch the metal with our tweezers, which are connected to 3V, then Pin 2 will receive 3V of power and it will change its value to 1, meaning “On” If Pin2 is turned on (==1) then the code contained in conditional test will run.
Add the following code before moving on.
if pin2.read_digital() == 1:
Now our code indents again, to show that this is the code which will run if the conditional test is proven to be True, in other words the surgeon catches the metal around the patient’s wounds.
The first thing that will happen is that the LED matrix on the micro:bit will show an angry face, as we have just hurt the patient! Then we shall turn on Pin 1 which is attached to the LED which our patient has for a nose. Then we shall use speech synthesis to have the micro:bit say “OUCH!”. We then pause for 200ms (? of a second.)
Add the following code before moving on.
            display.show(Image.ANGRY)
            pin1.write_digital(1)
            speech.say("Ouch!")
            sleep(200)
Still inside the conditional test, and still writing the code for when our surgeon hurts the patient, we now need to deduct a life from the surgeon. So now our “lives” variable is updated to deduct one life from the current value of the variable. We then use speech to tell the player how many lives they have left. We then turn off the LED connected at Pin 1 resetting the game for the next attempt and reset the connection at Pin 2 so that our surgeon can try again.
Add the following code before moving on.
            lives = lives -1
            speech.say("You have " + str(lives) + " lives left.")
            pin1.write_digital(0)
We now write a second conditional test, but this time the test will be called “else” and this test will run when the surgeon has not touched the metal around the patient’s wounds. In this case it will show a happy face on the micro:bit’s LED matrix.
Add the following code before moving on.
        else:
            display.show(Image.HAPPY)
We now come out of the conditional test, and the “while lives > 0” loop. So now our code is still inside the main “while True:” loop, which means it is indented by four spaces from the left of the screen. This code will run when the surgeon loses all of their lives. The micro:bit will speak “GAME OVER” and then reset the “lives” variable to 3, giving the next player a chance to save the patient.
Add the following code before moving on.
    speech.say("GAME OVER")
    lives = 3
That’s it! We have written the code that will control our game.
Complete Code Listing
Here is all of the code for this project, does it match yours?
from microbit import *
import speech
lives = 3
while True:
    display.scroll("You have " + str(lives) + " lives")
    speech.say("You have " + str(lives) + " lives to operate on the patient. Good luck")
    while lives > 0:
        if pin2.read_digital() == 1:
            display.show(Image.ANGRY)
            pin1.write_digital(1)
            speech.say("Ouch!")
            sleep(200)
            lives = lives -1
            speech.say("You have " + str(lives) + " lives left.")
            pin1.write_digital(0)
            pin2.write_digital(0)
        else:
            display.show(Image.HAPPY)
    speech.say("GAME OVER")
    lives = 3
Test the Game
In order to test the game we need to write this code to our micro:bit. Plug in your micro:bit to your computer using the micro USB to USB lead. Your micro:bit will appear as a USB flash drive. In the Mu application click on “Flash” to write the code to the micro:bit. If you look at the micro:bit you will see a flashing yellow light on the back of the board, this tells us that the information is being written. Once it stops flashing the micro:bit will reset and your Operation code will run! Now pick up the tweezers and remove those items from the patient!
How can we take this further?
The code for this project can also be used to create a buzz wire game, where the player must navigate a twisty maze of wire with a wand. If the wand touches the wire then a buzzer goes off. All you need is some stiff wire, a coat hanger is ideal, some modelling clay, and study frame to hold the wires, cardboard is ideal but you can also use a piece of wood but you will need to drill holes into it.
So this one project can spawn another game, something that you can make for very little money.
Learn More
History of Operation Game
https://www.classicgamesandpuzzles.com/Operation.html
MicroPython Speech Module
http://microbit-micropython.readthedocs.io/en/latest/tutorials/speech.html
More about while loops
https://www.khanacademy.org/computing/computer-programming/programming/looping/p/intro-to-while-loops
https://kidscodecs.com/loops-a-fairy-tale/
https://www.youtube.com/watch?v=eSWCgZBSx_U