
The term “low floor high ceiling” is sometimes used to describe activities that require minimal background knowledge to begin exploring, but lead to deep and challenging ideas.
This category of products tends to be a hard find in robotics. On one end of the spectrum we have simple robots that are easily controlled by a remote, and on the other end are price-prohibitive, extremely complex robots designed and controlled by experts. For many children and families, perhaps the million dollar question is what can we do to gradually progress from pushing buttons on premade robotic devices, to designing, building, wiring, and programming increasingly complex robots of our own?
As it turns out, there are quite a few options for those looking to get into robotics. Once high school rolls around there are national robotics teams, and before that there are robotics summer camps and afterschool programs galore. But for the motivated child with a bit of family support, the mBot is a fun and relatively economical way to get started right at home.
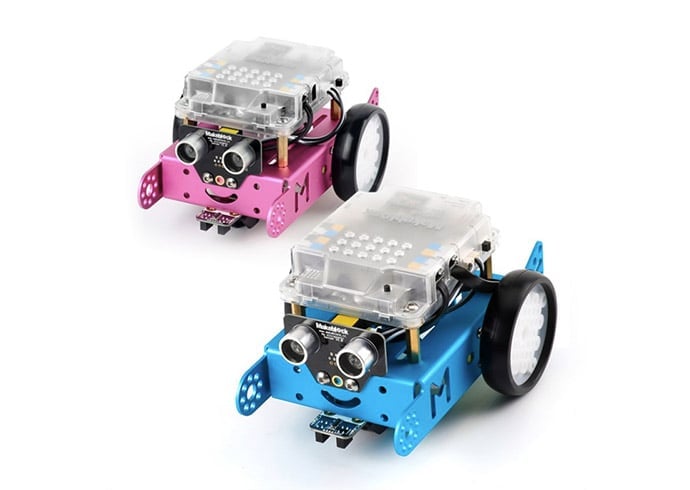
The basic mBot can be purchased for around $60, a price that buys approximately 30 metal pieces and electronic modules, and an assembly guide to make sure you can put together them correctly. The level of difficulty is right around what one expects when buying a lego set for an 8-12 year old, with the novelty of including real nuts and bolts, plus a few pieces that look like complicated parts from the insides of a computer. As such, the mBot begins as an exercise in mechanics, which is indeed a key component of robotics.

Before starting, prepare your own AA batteries (or a 3.7V lithium battery), as well as a set of hex wrenches of various sizes. A button cell battery (CR2025) for the remote control must be purchased separately as well.
Once built, the mBot is immediately ready for action using the included remote control, or can be put to the side for a moment while setting up the mBot programming environment (mBlock) on a computer.
For those familiar with drag and drop programming with Scratch, the setup looks quite familiar as the makers of mBot developed the environment basically by adding a robot library to the Scratch interface. The mBot can be programmed to move in all directions, follow lines, and display lights of different colors all through a modified version of Scratch 2.0. The corresponding Arduino code is displayed in part of the window, and programming can be done with the Arduino language as well.

Fun beginner activities include adjusting the levels of red, green, and blue in the LEDs to create your favorite color lights, making the LEDs blink, and programming mBot to travel through mazes or cities built with your favorite toys. Bluetooth is available for the robot at an extra price, but even without it, mBot can be disconnected from the computer and continue to run your code after you upload it to the bot.
Drag and drop programming with the basic mBot can be extended further than many programmable robots for beginners. However, the truly unique feature is that Makeblock, the creators of mBot, sells an array of add ons that run about $2 – $52 each. For example, if you are interested in adding code that involves a temperature sensor to act as a trigger for an action, the block of code is available in Scratch for mBot, and a compatible, waterproof temperature sensor can be purchased from the online store for $6.99. How about an ultrasonic sensor or a 3-axis gyro? These components are part of a list of add ons that are also available to order online, with code to go with them in mBlock.
In fact, the Makeblock website is something of a mini robotics store where one can shop to buy individual mechanical components, sensors, and electronic modules that are used to build a custom-designed bot from scratch. From beams, brackets, and gears, all the way down the line to pneumatics and hydraulic parts for robots can be found. These components can be used in a range of activities, from quick add ons to the mBot, to designing and building an entirely new device.
The only functionality issue that we came across is a common issue with motors in robotics. The two motors that control the wheels may not be perfectly in sync, and if one wheel rotates a bit faster than another, the mBot does not follow a straight line, even when programmed to do so. Fortunately, this can be resolved with one line of code by using the “set motor” blocks in Scratch to speed up the lagging motor.
After periodically following Makeblock for over a year, it is fun to see how the company has grown from producing a couple robots for kids into a full blown site for robot hobbyists. Robots are never a cheap business, but Makeblock shows dedication to keeping costs down, addressing the needs of families and educators, and also providing challenges that are fun even for those with years of experience. The mBot is a fun place to start, and from there the ceiling is very high.
Learn More
Makeblock
Makeblock Educator Resources
http://www.makeblock.com/stem-education
Makeblock Programming Language
http://learn.makeblock.com/software/
Programming mBot with Scratch or Arduino
http://www.instructables.com/id/How-to-make-a-mBot-with-Makeblock/?ALLSTEPS
Learn Arduino programming with Makebot
http://learn.makeblock.com/en/learning-arduino-programming
Arduino library for Makebot electronic modules
https://github.com/Makeblock-official/Makeblock-Libraries
Makeblock Review
http://www.techagekids.com/2015/10/makeblock-mBot-robot-for-kids-review.html