


One day you are working along nicely on your computer, and (it seems like) the next day it is out of date… not enough memory to handle the operating system upgrades and not enough power to run programs. So, you have a computer that you can’t use anymore, but it seems like a waste to toss it out.
A great project for an older machine that’s perhaps destined for landfill or a more eco-friendly option like an electronics recycling center, is to try and install a Linux operating system on it and give it a new life. Let’s look at how we can do this.
The first and most important step of this entire process is to make sure that you have backed up any important files and information from the old laptop that you want to use in this project. When we install the new operating system to the hard drive, we will erase everything on it so go ahead and backup then double-check you have everything backed up.
Our target laptop is a Thinkpad E131e which sports an I3 processor and 4GB of RAM installed…so pretty old and not very fast by today’s standards. This laptop would originally have had Windows 7 installed on it. There isn’t enough power and memory to upgrade this machine to higher versions of Windows. That said, we bet that we can get this machine to a point where it can do general browsing, word processing, and other light tasks easily using Linux.
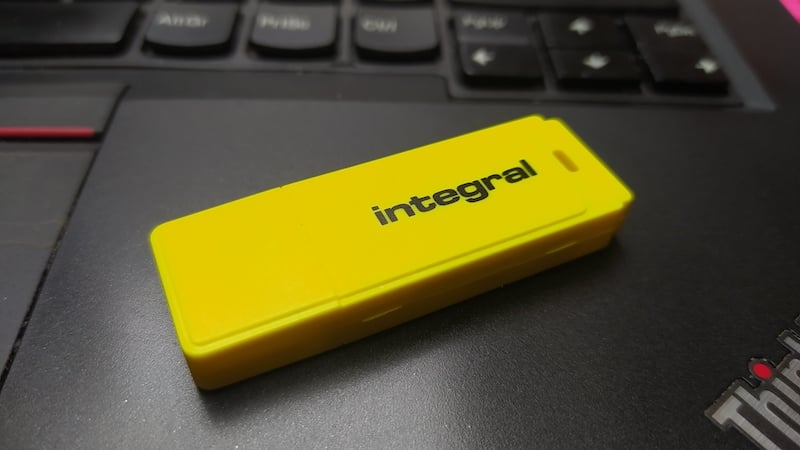
To start, we will most likely need an 8GB USB drive or larger. They are easy to find and, if you don’t have one already, they’re a useful cheap drive but the one we prefer is called Etcher. (https://www.balena.io/etcher). Etcher is free and available for Windows, MacOS, and Linux, so
download the version that works on your main machine.
The next thing we will need is a disk image of the Linux distribution we would like to try out. As the majority of Linux distributions are free and open source, there is a huge amount of different Linux “flavors” that we encourage you to try out. Creating a bootable Linux USB drive means that we can boot the laptop to try the Linux distribution without installing it into the machine. This allows us to try out a few different Linux operating systems and then fully install the one that we like.
If you are used to Windows, a good option could be Linux Mint, which runs pretty well on older hardware but looks and feels a little like Windows and is perhaps easier for a first-time Linux user. Another hugely popular Linux distribution is Ubuntu, which is fully featured but might not work quite as well with a limited older machine.
Some Linux families, like Ubuntu or Debian, have different distributions that add or strip down features. In the Ubuntu family, there is a great distribution called Xubuntu which has a lot of the structure of Ubuntu but is a little leaner and stripped down to run well on older hardware. We could talk a lot about the pros and cons of different Linux systems but really the best advice is for you to download a bunch of disk images of different Linux operating systems and try them.
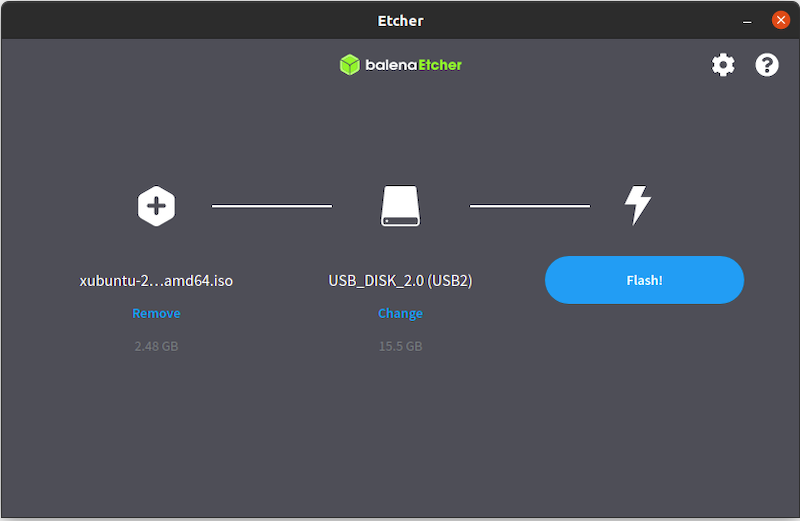
For our example, we downloaded the latest stable version of Xubuntu. Once downloaded we can make our bootable USB drive. Insert the blank USB drive into the main machine where you installed Etcher and downloaded the Linux image. Launch the Etcher application. It should have a button that says “Flash From File”. Click this and navigate to the downloaded image file and select it.
Next, it will ask you to “select a target” drive to write the image to. Take time to make sure that you are selecting the blank USB drive and not anything else. It’s likely that the main drive in your computer will be on the selection list, as well, so be extremely careful. With the correct image and drive selected, it’s as simple as clicking “Flash!” and Etcher will write the image to the USB drive and create a bootable drive. Once completed, eject the drive and move over to the target machine.
We might need to change a setting in a system called “BIOS” to make the target computer try to boot from the USB drive rather than its internal drive. All computers tend to have different ways to enter the BIOS system. When you power on the target machine, there is a brief message that says “Press Enter to interrupt normal booting”. We then press enter and it takes us to a short list that includes “enter BIOS”, which we can select to move to the BIOS system. On other systems, you might need to press F2 or F12 or potentially other keys on booting, the best option is to search the internet with the model number of the target machine and how to enter the BIOS menu.

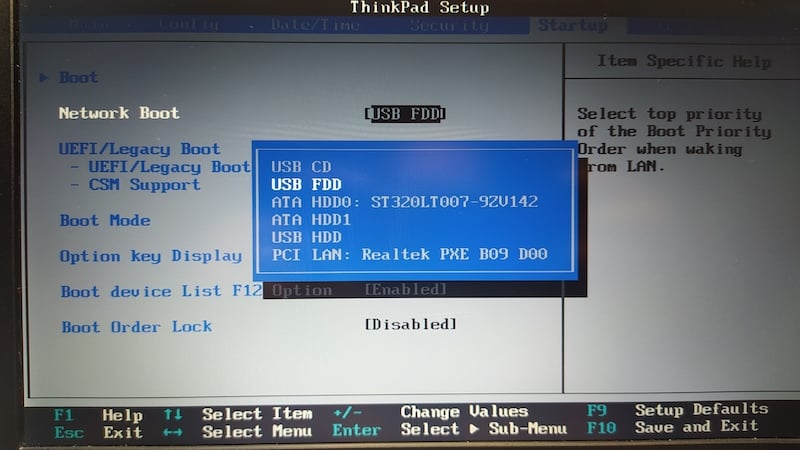
Once in the BIOS menu, you are looking for a tab that might be titled “boot” or “startup”. You’ll notice in BIOS you can’t use the mouse to navigate, so use the arrow keys and enter to make selections. Most BIOS systems have a list of keys and their uses across the bottom of the BIOS screen. Once you are on the Boot or Startup tab, you should see something that controls the order of boot devices; basically, this is a priority list where the first thing it finds on the list that it can be booted from, is the device it will use to boot the computer. So what we need to do is edit this list so that the USB drive, usually represented in BIOS as “USB FDD”, is higher up on the list than the laptop’s internal hard disk drive, usually called the “IDE HDD”. Once you have done this, you usually press F10 to save changes and Exit to continue to boot.

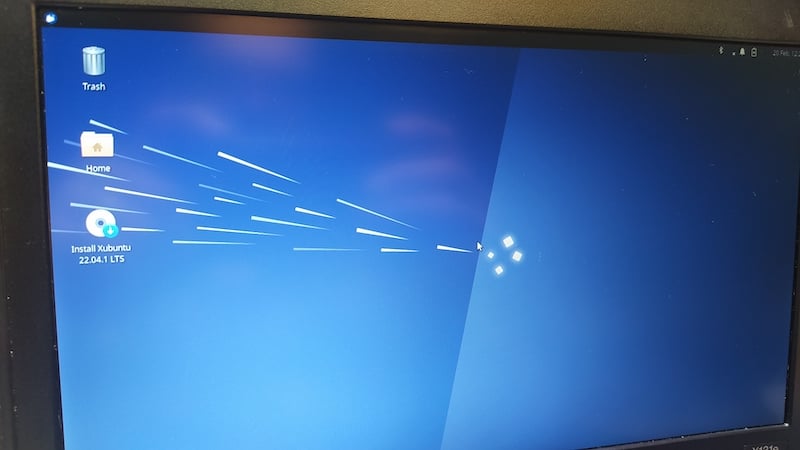
Alternatively, if you press F12 on boot, you can select a temporary startup device. With our USB drive set up as the boot device, the machine should now boot into Xubuntu. This might take a while but eventually, Xubuntu appears and you are asked if you want to install Xubuntu or if you want to install Xubuntu to the hard drive. It’s a really good idea to try your Linux distribution running as a temporary operating system off the USB drive. This allows you to check if everything is working. So, connect to your wifi, check if things like the sound are working, and play in the temporary running operating system to see if you like it.
Most “live” versions of Linux, when running from a USB drive, will have a desktop icon that you can click to install the operating system to your hard drive when you are ready. This means you can play with testing as many Linux operating systems as you like on your old machine until you
find one that you like and make a permanent install. Happy hunting.